Thursday, May 21, 2015

Bathroom Redos

May is such a busy month for us, not only do we have high school graduations but we also have a college graduation!! The first week of the month was CU's graduation and we blew up SO MANY gold and black balloons!! I'm looking forward to this weekend and blowing up purple and gold and red, white, and black balloons!

Anyways, a couple months ago I decided we needed to redo our guest/downstairs bathroom. I really hate those wall-length mirrors that are from like the '90s. You can see them in the before pictures. So I wanted to replace that with just a regular framed mirror, put in some shelves, some wall art, and paint. We picked out a nice ocean-y blue. When we went to get the paint, we were closer to Lowe's than Home Depot and figured their paint would be just as good (we usually go to Home Depot for everything). We picked out the color, got to checkout and it rung up as $45!!! We looked at each other and were like "no way" so we left the paint there and got $25 paint from Home Depot!! Lesson learned: Always go to Home Depot! Originally, I did volunteer to paint because my husband doesn't love to paint but my loving husband painted the whole thing one day before I even knew about it! (I love him). So first before pictures and then after pictures:

Yucky wall-length mirror

Boring white walls (plus weird picture that the guy who lived here before left)
New pretty framed mirror!

Pretty shelves
Yes, the sand and seashells are actually from Florida. Sand from Mexico City Beach, I believe, and seashells are from when Cliff and I went to Jacksonville.

Dolphin from my cruise to Jamaica and awesome Mermaid picture painted for me by my brother's super talented girlfriend.
Wall art made by me


I loved this bathroom makeover so much that I decided we HAD TO update our master bathroom too. I have no before pictures but just imagine that it had the same gross wall-length mirror that the downstairs bathroom had. We picked out a peach color for the wall (I know it looks kinda orangey in one of the pics but believe me it is gorgeous in person!), added new lights, and as luck would have it we found framed mirrors in the same wood color as our cabinets!

New pretty framed mirrors and updated light fixtures!
Pretty peach colored walls!
It totally looks orange here but I LOVE the new curtains, they are a pretty green and so much better than what was there before (cleaner too)

So that's what we've been up to the last two months!

til next time,
nik

Wednesday, April 1, 2015

Craft Roundup #1

Hello!

It's been too long! Seems like running a business (and being sick) doesn't leave too much time for taking photos and blogging step-by-step directions for crafts. I have been crafting but when I do find time for it, I don't feel like taking a million pictures of each step. I have decided instead to *try* and do a weekly craft round-up (it might be more of a monthly but I'm trying for weekly). I'll post pictures of things I have made that week. Enjoy!

First up is the 8ft craft table my husband and I built. Instead of painting the top, I put contact paper on it. It was a lot harder than you would think but it is so cute! I love having a pattern on the top instead of just paint. I also LOVE how long it is!!

When my husband was out of town, I caught the crafting bug and decided that it was finally time to update our mantel decorations (it had been Christmas themed and it is March). I decided to make a pennant banner (I cut out 43 teeny tiny triangles and sewed them together). I bought some already cut fabric squares from Hobby Lobby and went with a teal theme:
I also like to keep a bible verse on the mantle. Previously it had been this one:
I loved seeing this everyday so I knew I had to find another bible verse that spoke to me. After browsing Pinterest, I settled on this one:
I love reading this everyday, it reminds me that God is in control and He knows what is best for us.

Next up, I decided to redo our guest bathroom. I want to paint it, take out the huge mirror and put in a nice normal-sized one, and add some floating shelves (which I haven't gotten to yet) BUT I have made these cute wall decorations for when I do finally get around to painting it:


Well, that's all I've done lately. Hopefully I'll get around to the bathroom in the next week or two, who knows!

til next time,
nik

Monday, December 22, 2014

Canvas Nativity

Found this in the archives and with Christmas around the corner, seems like the perfect time to post!!

I love Nativities but I have just never found one that I wanted to buy. Well, I came up with an awesome nativity set!!

I bought this guy a while ago, I was going to put a quote on it but suddenly I had a better idea!

I cut these out with my Silhouette:

This canvas had been painted white so I thought these would stick to it. They didn't. So I put each one on the canvas individually and used my NEW BEST FRIEND (Mod Podge!), to stick them to the canvas:
I thought I would need more than one coat of mod podge but to my surprise one coat was enough!

Finished product!! My hubby loved this one!! I can't see this going away after Christmas either, so it might stay year round too!

til next time & Merry Christmas,
nik

Sunday, November 9, 2014

Canvas Christmas Tree

I had a pack of two canvas sitting in my closet and this week I decided to do something with them.
I got these at Hobby Lobby for 40% off! (I love the Hobby Lobby App!)

I cut this out with my silhouette and placed it on the canvas:
I have found that vinyl does not stick well to canvas, so I used this as a stencil and painted the quote on. I read online that the trick to painting is to use mod podge to glue the stencil down and then the paint won't bleed. So I went over the whole quote with mod podge:
Verdict: It worked incredibly well! I didn't have to worry about any of the letters or vinyl moving around.

Then I painted. I chose gold for the star and alternated red and green for the quote, then brown at the bottom. 


I think I did about 4 coats of paint. It takes a lot of paint to cover canvas.

Once it was dry I peeled the vinyl off and used this little nail tool to help me get the vinyl out of the o's, a's and e's:


Finished product!! It looks like a Christmas tree!! This is one of my favorite things I've made in awhile. I absolutely love how it turned out! I already don't want to put it away after Christmas is over, so it might stay out year round!!

til next time,
nik


Sunday, November 2, 2014

Happy November!!

I love November. I love the changing leaves, I love the weather, I love Thanksgiving. I love a holiday that is about being thankful for things.

This week I worked on making a wreath for our front door. I have sat down to make a wreath at least three times and this time I finally gave up. Wreaths are not my thing. But making signs is my thing!
I painted this board brown:


Then I cut these out with my silhouette:

 And placed them on the board:

 Yay it looks good! After doing this I wondered if brushing mod podge over the top would make it look better. I like mod podge but EVERY TIME I use it I have this fear that it is not going to dry clear and end up looking like this:

(This is before it dried)
 Even though I have used it on multiple projects and it ALWAYS dries clear, that fear always comes back when I use it.

Finished product!!
The mod podge didn't actually make any difference at all. I can't wait to hang this on the front door!!

Happy November!!

til next time,
nik

Wednesday, October 29, 2014

Menu Board

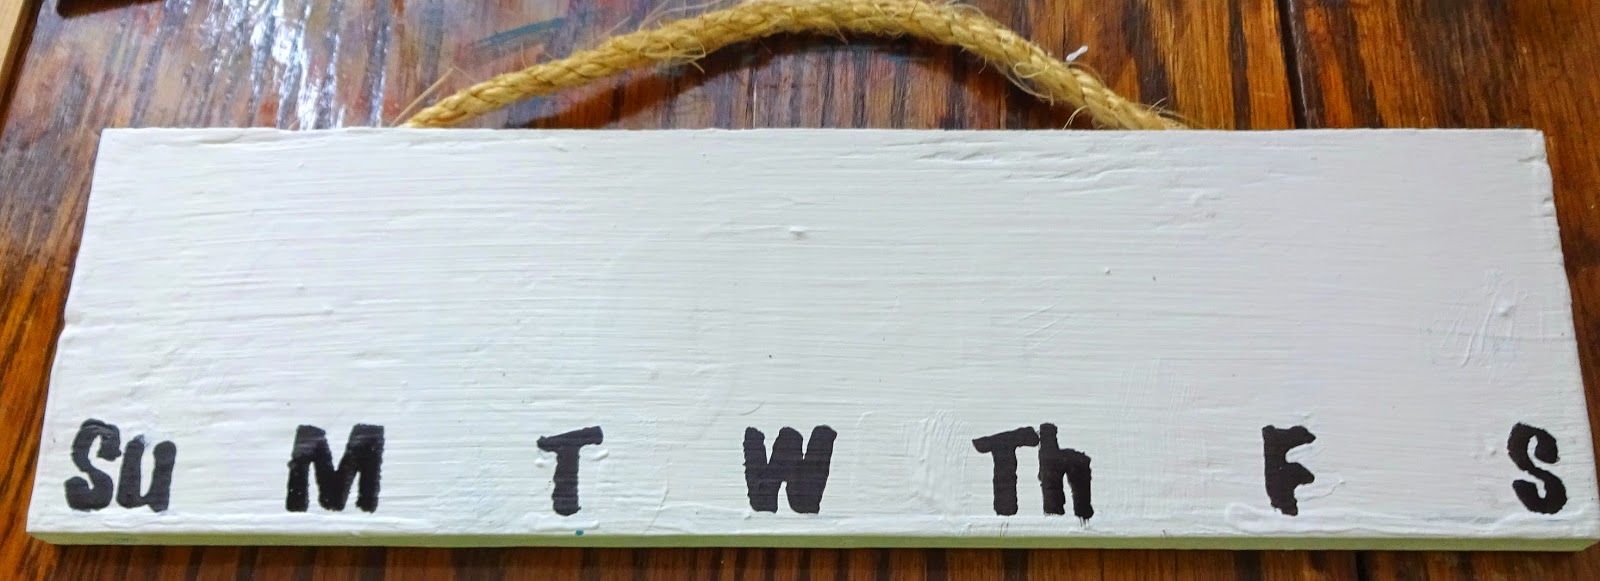
I have been wanting some kind of menu board for awhile. I really love the chalkboard ones but just can't bring myself to buy one. Using things that I already had, I created one. Now this one works for me because I only cook once, maybe twice a week. If I cooked more, I would need a bigger menu board.

I have a bunch of these boards sitting in my closet, I used to use them when we lived in Alabama to put quotes or "Go Noles" on!


 I printed out this guy with my Silhouette:

I decided to stencil the days of the week on the board instead of using my Silhouette.

I wrote them in pencil just in case I made a mistake and it was a good thing I did because, of course, I needed to move some around.

It was easy enough to just paint over the erased pencil marks with white paint. And then I just painted the letters black.


And added what I had printed out with my Silhouette at the top:

Then my loving hubby helped me screw in these hooks underneath each day of the week. We tried just screwing them in but ended up having to drill starter holes in order to screw them in.

Then I found these adorable metallic binder clips that I hung on each hook

The plan is to clip a recipe onto whatever day I'm going to cook that recipe. So far it's worked well. I planned to cook Pork Chop Casserole on Tuesday and did. Then I ate leftovers for a week. I need to find more recipes for one, since my hubby doesn't eat what I eat. I get tired of eating leftovers after a couple days. Any suggestions?

til next time,
nik


Sunday, October 26, 2014

A Tale of Failure

I like to try new things. I see something and think "I could make that" and probably 6 times out of 10, I can figure it out. But sometimes I don't. And today I'm going to share something that I just COULD NOT figure out.

Enter Rocking Chair:


Picked up at a thrift store by my Grandma and then given to me. The seat cushions were the same ugly fabric as the ottoman, they were just being washed when this picture was taken. They didn't wash well so enter the idea of new cushions!! I mean, come on how hard could it be to recover new cushions? It's just measuring, cutting, and sewing. (Ha, if only I had any clue.)

I first tried to measure the chair and then cut out cushion stencils on cardboard. That DID NOT work. Then I had a genius idea, why not take the old cushions and trace them? Hello! Totally worked!!


I cut those out with scissors (which by the way took FOREVER). Then came the fun part, buying foam and FABRIC! (I love fabric, I pretty much hoard it). My hubby and I decided on 2 inch thick foam because it would be more comfortable.

The green fabric was going to be the ottoman, the other fabric the chair.

Next problem, how do you cut 2inch thick foam?? Answer: With a knife and a lot of time.

After cutting out the bottom cushion, I thought I would cover it and then cut out the top cushion. (Reason being I was tired of cutting through foam, plus I thought this would be the easy part).

Now everyone says "measure twice, cut once." I decided to trace my cushion 2 inches bigger all the way around then it actually was. I sewed it up and....it was too big and too small. How can it be both?? Trust me, it can. It was too big wide and too small length. So I took it in on the sides and added 2 inches of fabric.

Is this real life? It was now too small. So I decided to start on the back cushion. I figured I would learn from my mistakes. Ha.
Cutting it out from the foam wasn't so bad. I pretty much have the hang of cutting foam now. Now, when I traced my fabric, I cut just about an inch bigger than I needed.
The frickin' thing didn't fit. This is after I had already doctored it. The first time it ended up being 2 inches too small!! So I added 6 inches, 2 for each side and 2 for the width. Still too frickin' small!! How is that even possible?!?!

It was at this point that I quit. Sometimes you just gotta admit when something has the better of you. I had already put in too much time and effort that it wasn't even worth it to me anymore. I'd love to admit that every time I try something it works, but that's not real life. Sometimes I try things and they don't turn out at all. And that is okay.

So off to Target I went to see if there was such a thing as a "rocking chair slipcover". Guess what? There's not. But after an hour of wondering around (and finding multiple things I did not need but couldn't not buy) I found this:
It says right on the package "fits multiple shapes and sizes". Guess what? It doesn't. The dang thing didn't work, so it will be going back to Target. But while I was wandering around Target, I found this baby ON SALE:
Flannel sheet set for $35! Awesome because we needed new sheets!

So can you guess what the rocking chair is wearing?

Yep, old sheets. And guess what? I love it! And guess what else? It's staying like that for awhile.

Any tips or tricks on recovering cushions is appreciated. One day I may get tired of the sheet and decide to try again.

So not every craft I do is perfect or even gets finished. But just because I failed doesn't mean I won't craft again or even try my hand at this again.

Oh, also, I'm trying to get better at blogging again. We'll see how this goes.

til next time (hopefully that's soon),

nik